Specifications
I was tasked with adding a ‘Panic Alert’ functionality to an existing Flutter (mobile) application. Here’s the breakdown:
- Add a way for a user to initiate a Panic Alert easily, but without being able to trigger it by accident.
- Get the user’s location in GPS coordinates, send it to a middle-man server to be processed and displayed for security providers.
- Display a map on their screen, and center their location on it, so they can be at ease while in a stressful situation.
- Implement a ‘Test Mode’, which lets the user start a panic, without actually sending the alert all the way through to the security provider.
Plug-in Breakdown
When I first started, I had no idea which plug-ins would be useful, but over weeks of researching (googling), I found these three that finally clicked everything into place:
- Google Maps Flutter - This plug-in lets you render a map of the user, as well as giving you controls to programmatically move the virtual camera. Very useful, though a bit finicky.
- Location - Lets you get an accurate location, down to the address, as GPS coordinates. Incredibly easy to use, but needs permissions on the Android/iOS level.
- get_it - An incredibly easy way to access backend data from the frontend, it effectively packages your classes as Javascript objects and makes them accessible from anywhere, supports singletons as well. (In our implementation, each time you see locator<ServiceName>, that’s this plug-in.)
Implementing The Button
Button Building (Expand for Code)
Container(
  child: ValueListenableBuilder(
    valueListenable: locator<HomeServices>().testMode,
    builder: (context, value, child) => ValueListenableBuilder(
      valueListenable: locator<HomeServices>().hasInternet,
      builder: (context, value, child) => Container(
        height: MediaQuery.of(context).size.height * 0.3,
        width: MediaQuery.of(context).size.height * 0.3,
        child: Material(
          shape: RoundedRectangleBorder(borderRadius: new BorderRadius.circular(360)),
          color: locator<HomeServices>().testMode.value ? Colors.deepPurple[200]: Colors.amber[600],
          child: InkWell(
            borderRadius: new BorderRadius.circular(360),
            child: Column(
              mainAxisAlignment: MainAxisAlignment.center,
              crossAxisAlignment: CrossAxisAlignment.center,
              children: [
                Text(
                  locator<HomeServices>().testMode.value ? 'Test Alert': 'Alert!',
                  style: TextStyle(
                    fontSize: 36,
                    fontWeight: FontWeight.bold,
                    color: Colors.black,
                  )
                ),
                if(!locator<HomeServices>().hasInternet.value) ...[
                  Text(
                    '(No Internet)',
                    style: TextStyle(
                      fontSize: 18,
                      fontWeight: FontWeight.bold,
                      color: Colors.black,
                    )
                  )
                ],
                Text(
                  locator<HomeServices>().testMode.value ? '(Hold | Safe Alert)': '(Hold)',
                  style: TextStyle(
                    fontSize: 12,
                    fontWeight: FontWeight.bold,
                    color: Colors.black,
                  )
                ),
              ]
            ),
            onTapDown: (_) {
              HapticFeedback.mediumImpact();
              alertTimer = Timer(Duration(milliseconds: 2500), () {
                locator<HomeServices>().startAlert('Panic', null);
                locator<NavigationService>().navigateNamedAndRemoveUntil(AlertView.pathName);
              });
            },
            onTapUp: (_) {
              alertTimer?.cancel();
            },
          )
        ),
      )
    )
  )
)
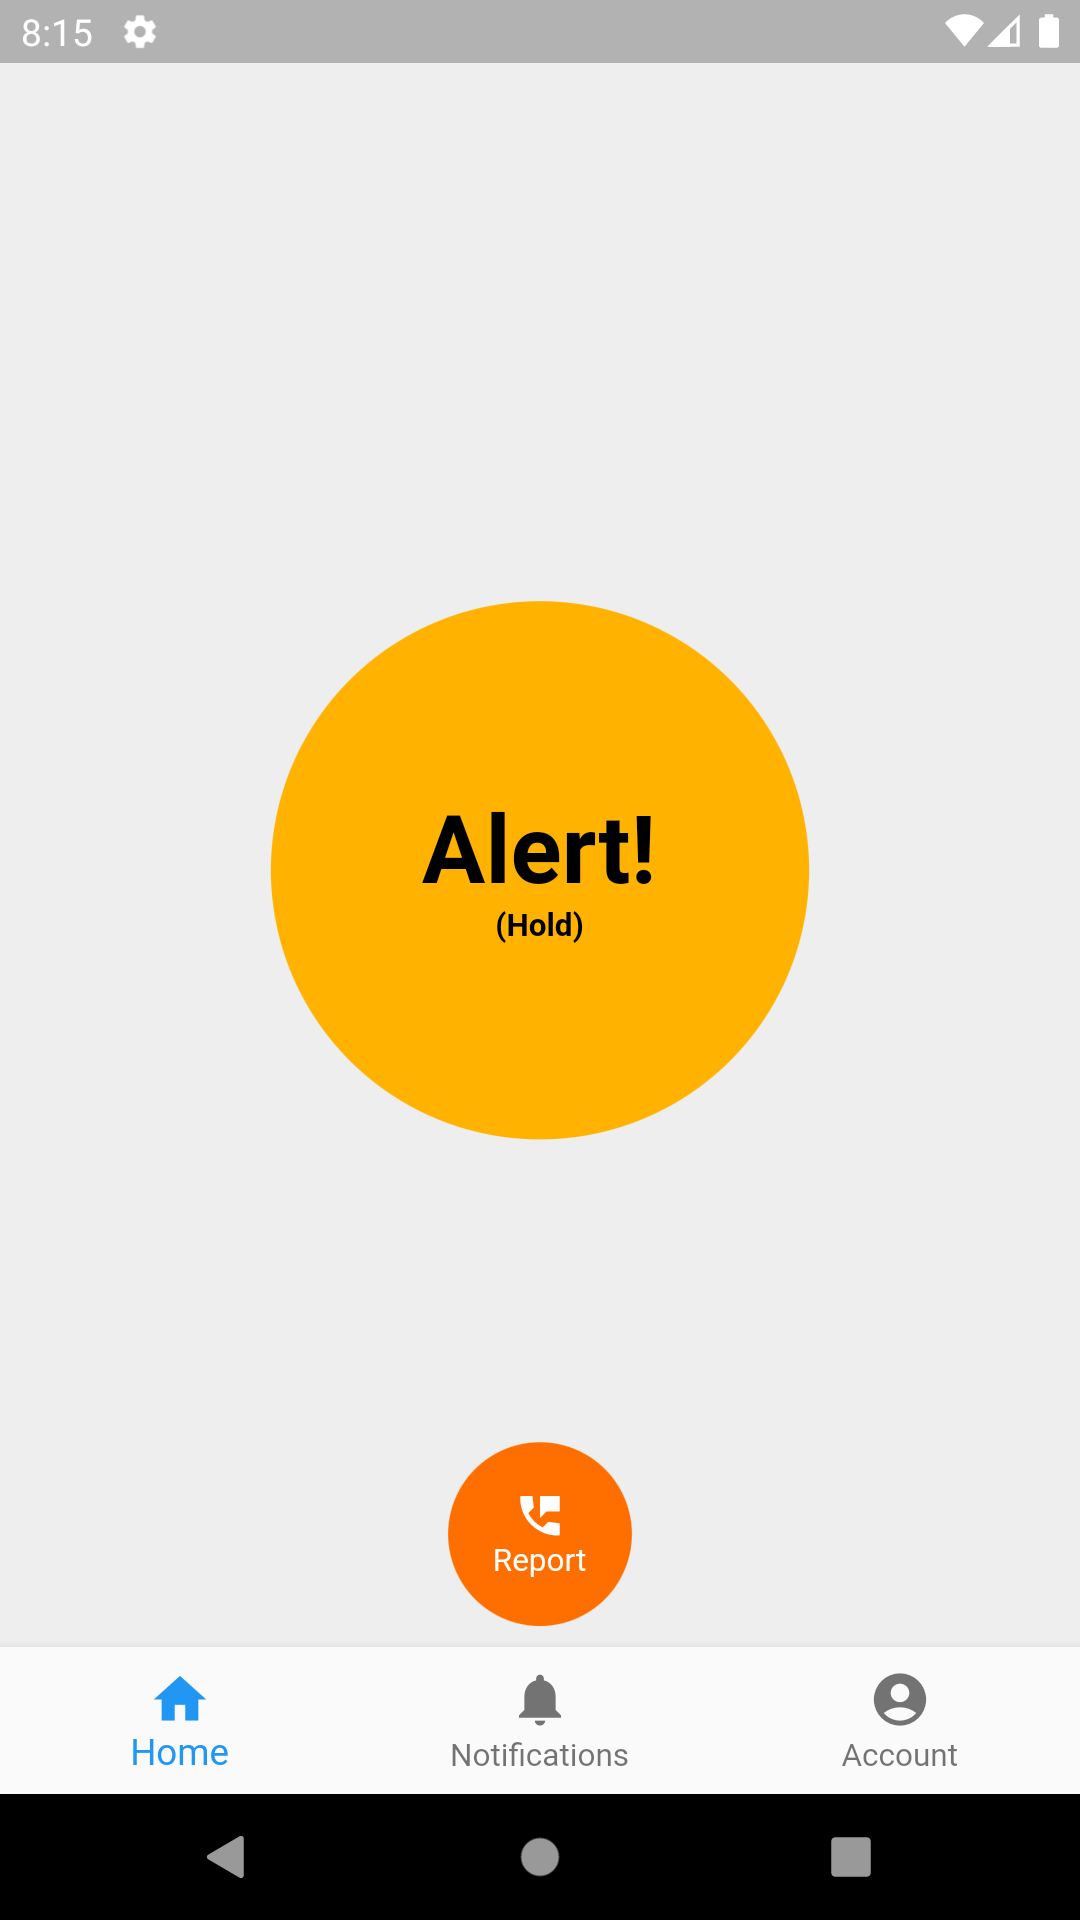
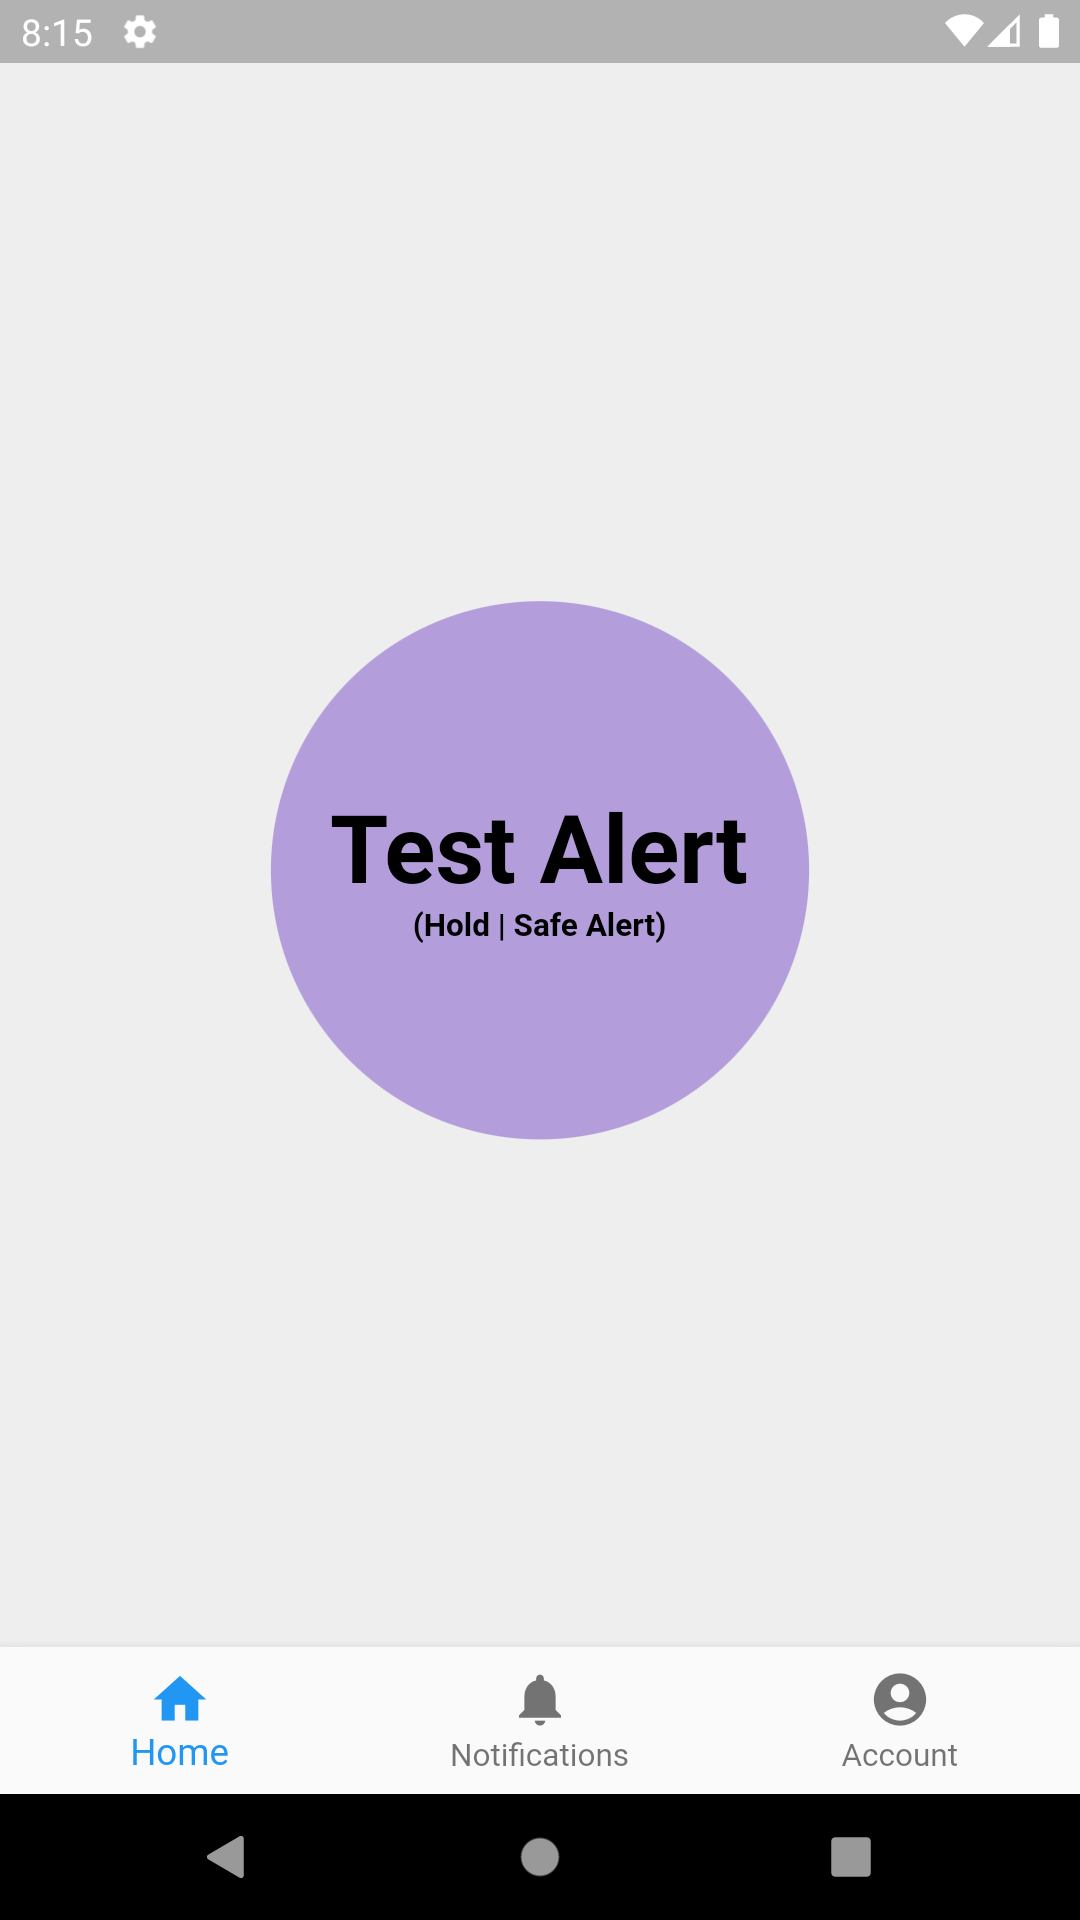
I had two challenges with this button. The custom long-press cooldown, not natively supported by Flutter, and the state change when the app is in 'Test Mode'.
I tried a lot of solutions, until I came across the Inkwell component. I could define a Timer at the top of my class like so: Timer alertTimer;. Then, upon your finger touching the button, it’d start the timer with the onTapDown function, and cancel it if your finger lifts before it finishes, with the onTapUp function.

Next up is updating the UI for the ‘Test Mode’, but also handling test mode when it runs out, as it only lasts for thirty seconds. I found the ValueListenableBuilder to be extremely useful here, as it makes use of Flutter in-built ValueNotifier, which lets you listen to variable changes from anywhere. The ValueListenableBuilder listens for the current state of the ValueNotifier variable, and builds a separate state below it. Whenever that variable changes, the ValueListenableBuilder automatically rebuilds its state without needing a custom function, taking a lot of state management off my hands. All I had to do now was implement the ValueNotifier variable in one of my services and update it via a switch in the settings menu, more on that later.
Getting the User’s Location
Sixty Second Loop (Expand for Code)
while(alertActive.value) {
 hasInternet.value = await checkInternet();
 if(hasInternet.value) {
   BotToast.showSimpleNotification(title: isTestAlert ? "Testing your location..." : "Sending your location...", duration: const Duration(seconds: 60));
   locationPlugin.LocationData userLocation = await getUserLocation();
   if (userLocation != null) {
     try {
       Map<String, dynamic> customerProfile = SharedPrefUtil.getCustomerProfile();
       Object data = {
         'email': customerProfile['email'],
         'ProviderId': settings.getBrandProvider(),
         'lat': userLocation.latitude.toString(),
         'lng': userLocation.longitude.toString(),
         'accuracy': userLocation.accuracy,
         'speed': userLocation.speed,
         'speedAccuracy': userLocation.speedAccuracy,
         'heading': userLocation.heading,
         'time': userLocation.time,
         'message': "PANIC GPS",
         'isTestAlert': isTestAlert,
         'mobileEventType': currentEventType,
         'mobileEventId': currentEventId
       };
       print(data);
       await sendAlert(data);
       BotToast.showSimpleNotification(title: isTestAlert ? "Location found successfully!" : "Location sent successfully!", duration: const Duration(seconds: 10));
       await Future.delayed(Duration(seconds: 60));
     }
     catch(err, stackTrace) {
       await Sentry.captureException(
         err,
         stackTrace: stackTrace,
       );
       BotToast.showSimpleNotification(title: "Failed to get location, trying again in 15 seconds...", duration: const Duration(seconds: 15));
       await Future.delayed(Duration(seconds: 15));
     }
   } else {
     await Sentry.captureMessage('Failed to get location');
     BotToast.showSimpleNotification(title: "Failed to get location, trying again in 15 seconds...", duration: const Duration(seconds: 15));
     await Future.delayed(Duration(seconds: 15));
   }
 }
 else {
   BotToast.showSimpleNotification(title: "Check Your Internet Connection", duration: const Duration(seconds: 15), backgroundColor: Colors.red[100]);
   await Future.delayed(Duration(seconds: 15));
 }
}
Getting the Location (Expand for Code)
Future<LocationData> getCurrentLocation() async {
 print('getCurrentLocation');
 LocationData position;
 var location = Location();
 bool hasPermission = (await location.hasPermission() == PermissionStatus.granted && await location.serviceEnabled());

 if (!hasPermission) hasPermission = await location.requestPermission() == PermissionStatus.granted && await location.requestService();
 if (!hasPermission) BotToast.showText(text: "You need to Enable Location Service");

 if (hasPermission) {
   for(var i = 0; i < 4; i++){
     position = await _getLocation();
     if(position.accuracy < 100) {
       currentLocationData.value = position;
       return position;
     }
     await Future.delayed(Duration(seconds: 1));
     print(i);
   }
 }

 currentLocationData.value = position;
 return position;
}

Future<LocationData> _getLocation() async {
 LocationData position;
 try {
   var location = Location();
   print('Location.getLocation');
   position = await location.getLocation();
   print('position $position');
   return position;
 }
 catch(err) {
   print(err);
   return position;
 }
}
Now that we can start the Panic Alert, we need a loop that runs every sixty seconds to continually send the user’s location, to track if they’re moving or not. Doing so is fairly easy, just have a while loop that runs while the alert is active, get the location, send the data.
To get the location, I use the Location plug-in, which gets called from the top of the loop. The first challenge I faced here was the permissions. A previous developer already implemented some of the permissions, but I had to extend them to include getting the location from the background, which both Apple and Google are extremely sensitive about, which is good.
The Location plug-in already has the functions needed to request permission from the user, but we need to manually add the permissions we’re allowed to ask in the Android Manifest, which is a way of declaring ‘This is what we might need and will ask for’ before we’re actually asking for it. The file is called AndroidManifest.xml, and can be found in the /android/app/src/main folder path.
Android Manifest XML (Expand for XML)
<uses-permission android:name="android.permission.FOREGROUND_SERVICE" />
<uses-permission android:name="android.permission.ACCESS_FINE_LOCATION" />
<uses-permission android:name="android.permission.ACCESS_COARSE_LOCATION" />
<uses-permission android:name="android.permission.ACCESS_BACKGROUND_LOCATION" />
I’ll begin with the access permissions, thankfully they’re fairly straightforward. Fine Location is equivalent to getting someone’s address, obviously important for a Panic Alert app, but also for something like a taxi-service or food-delivery app. Coarse Location lets you find roughly in which city someone is, not ideal, but useful if you can’t get the fine location for whatever reason. Background location is the one that lets you retrieve location data even when the app isn’t active on the screen at the moment, whether by simply pressing the home button or locking the screen.
To launch an app that has Background Location permissions, you need to submit a Youtube video to the Play Store detailing why exactly it’s needed, and showcasing its use-case; they're very strict about it.
Lastly, the Foreground Service permission, which is the odd-one-out. I noticed with my phone, the battery saving techniques are obscenely harsh, killing the app after a minute even if it’s actively processing data. You can force the operating system to keep the app alive by designating it as a foreground service, which creates a little notification in the control center (when you swipe the notification bar down), which prevents it from being closed automatically.
With the permissions set-up, simply request the location. In this case, the previous developer inserted a for loop that only breaks when accuracy is 100%, improving the average accuracy you get, though there are more improvements and optimizations you could make.
Displaying the Map to the User
Laying down the Map Framework (Expand for Code)
GoogleMapController mapController;
LatLng _center = const LatLng(-30.5595, 22.9375);
double zoomLevel = 6.0;

@override
void initState() {
 super.initState();
 locator<LocationUtils>().currentLocationData.addListener(updateMap);
}

updateMap() {
 if(mapController != null && locator<LocationUtils>().currentLocationData.value != null) { mapController.animateCamera(CameraUpdate.newLatLngZoom(LatLng(locator<LocationUtils>().currentLocationData.value.latitude, locator<LocationUtils>().currentLocationData.value.longitude), 16.0));
 }
}

@override
void dispose() {
 mapController?.dispose();
 locator<LocationUtils>().currentLocationData.removeListener(updateMap);
 super.dispose();
}

void _onMapCreated(GoogleMapController controller) {
  mapController = controller;
}
Building the Map (Expand for Code)
Container(
 height: MediaQuery.of(context).size.height,
 child: GoogleMap(
   onMapCreated: _onMapCreated,
   initialCameraPosition: CameraPosition(
     target: _center,
     zoom: zoomLevel,
   ),
   minMaxZoomPreference: MinMaxZoomPreference(0, 16)
 ),
)
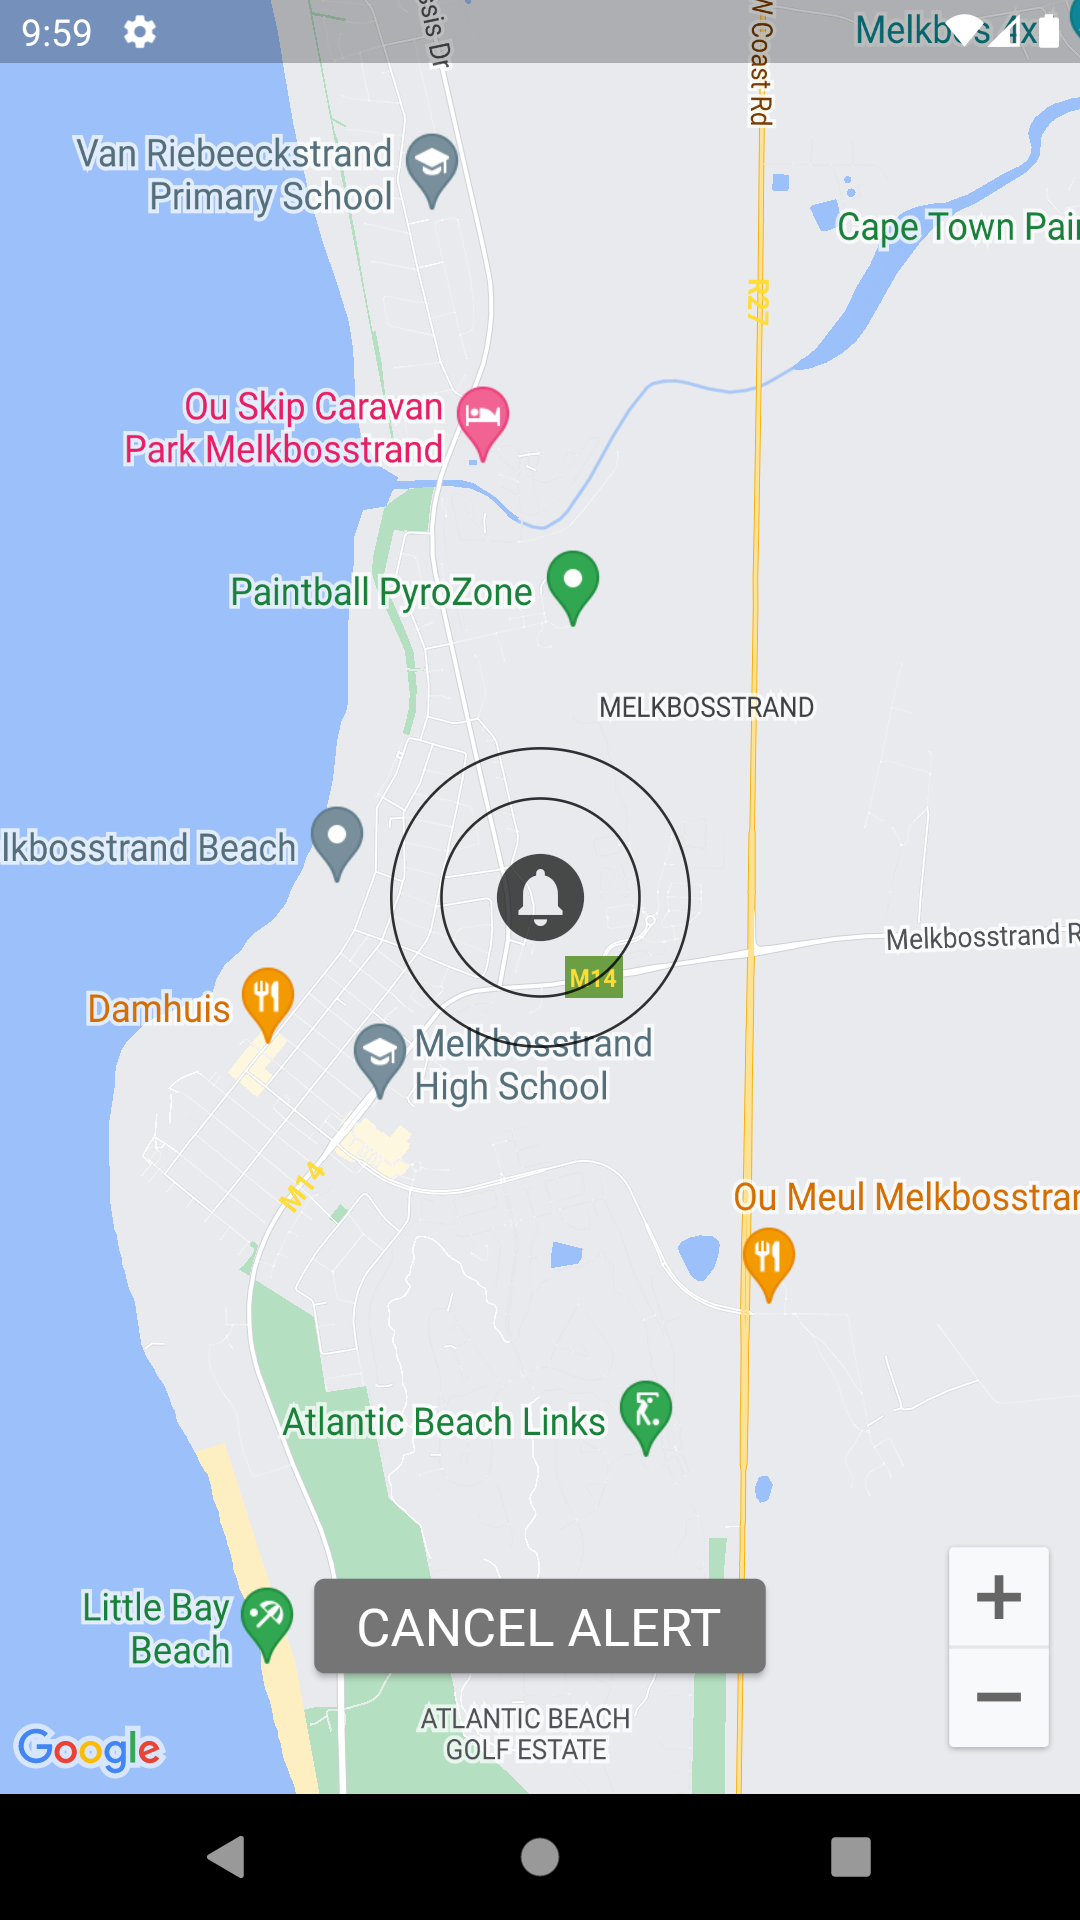
Now that we have the location in a backend service, all we have to do is render the map, and then move the camera so it centers on the location we got. For this app, I made it take up the entire screen by using MediaQuery.of(context).size.height, but any (reasonable) height works fine. I gave it a default _center position in the middle of South Africa by getting the latitude and longitude from Google Maps, and a 6.0 zoom level, which gives you a view of the whole country before you zoom into the calculated location. As an aside, I also specified a minMaxZoomLevel of 0 to 16, with 16 being the furthest the user is allowed to zoom in. At the time of adding this feature, zooming in any further seemingly crashed the plug-in, it might be fixed by now or sometime in the future.

Finally, to center the map whenever the backend location service finds the user’s location, we can put a listener on that ValueNotifier in the initState, which calls the updateMap function, which translates the map to those specific coordinates, as well as zooming in to the max 16 level, giving the user a clear view of where they are, and the area surrounding them.
That’s all you need to do to render a map, the google_maps_flutter plugin does all the rest.
The Test Mode Switch
In the Service (Expand for Code)
Timer testModeTimer;
ValueNotifier<bool> testMode = ValueNotifier<bool>(false);

void startTestMode() {
 testMode.value = true;
 testModeTimer = Timer(Duration(seconds: 30), () {
   testMode.value = false;
 });
}

void cancelTestMode() {
 testModeTimer.cancel();
 testMode.value = false;
}
In the Settings View (Expand for Code)
ValueListenableBuilder(
 valueListenable: locator<HomeServices>().testMode,
 builder: (context, value, child) => ListTile(
 title: Text("Test Mode"),
 trailing: Platform.isIOS
   ? CupertinoSwitch(
       value: value,
       onChanged: (bool newValue) {
         setState(() {
           value ? locator<HomeServices>().cancelTestMode() : locator<HomeServices>().startTestMode();
         });
       },
     )
   : Switch(
       value: locator<HomeServices>().testMode.value,
       onChanged: (newValue) {
         setState(() {
           value ? locator<HomeServices>().cancelTestMode() : locator<HomeServices>().startTestMode();
         });
       },
     ),
 ),
)
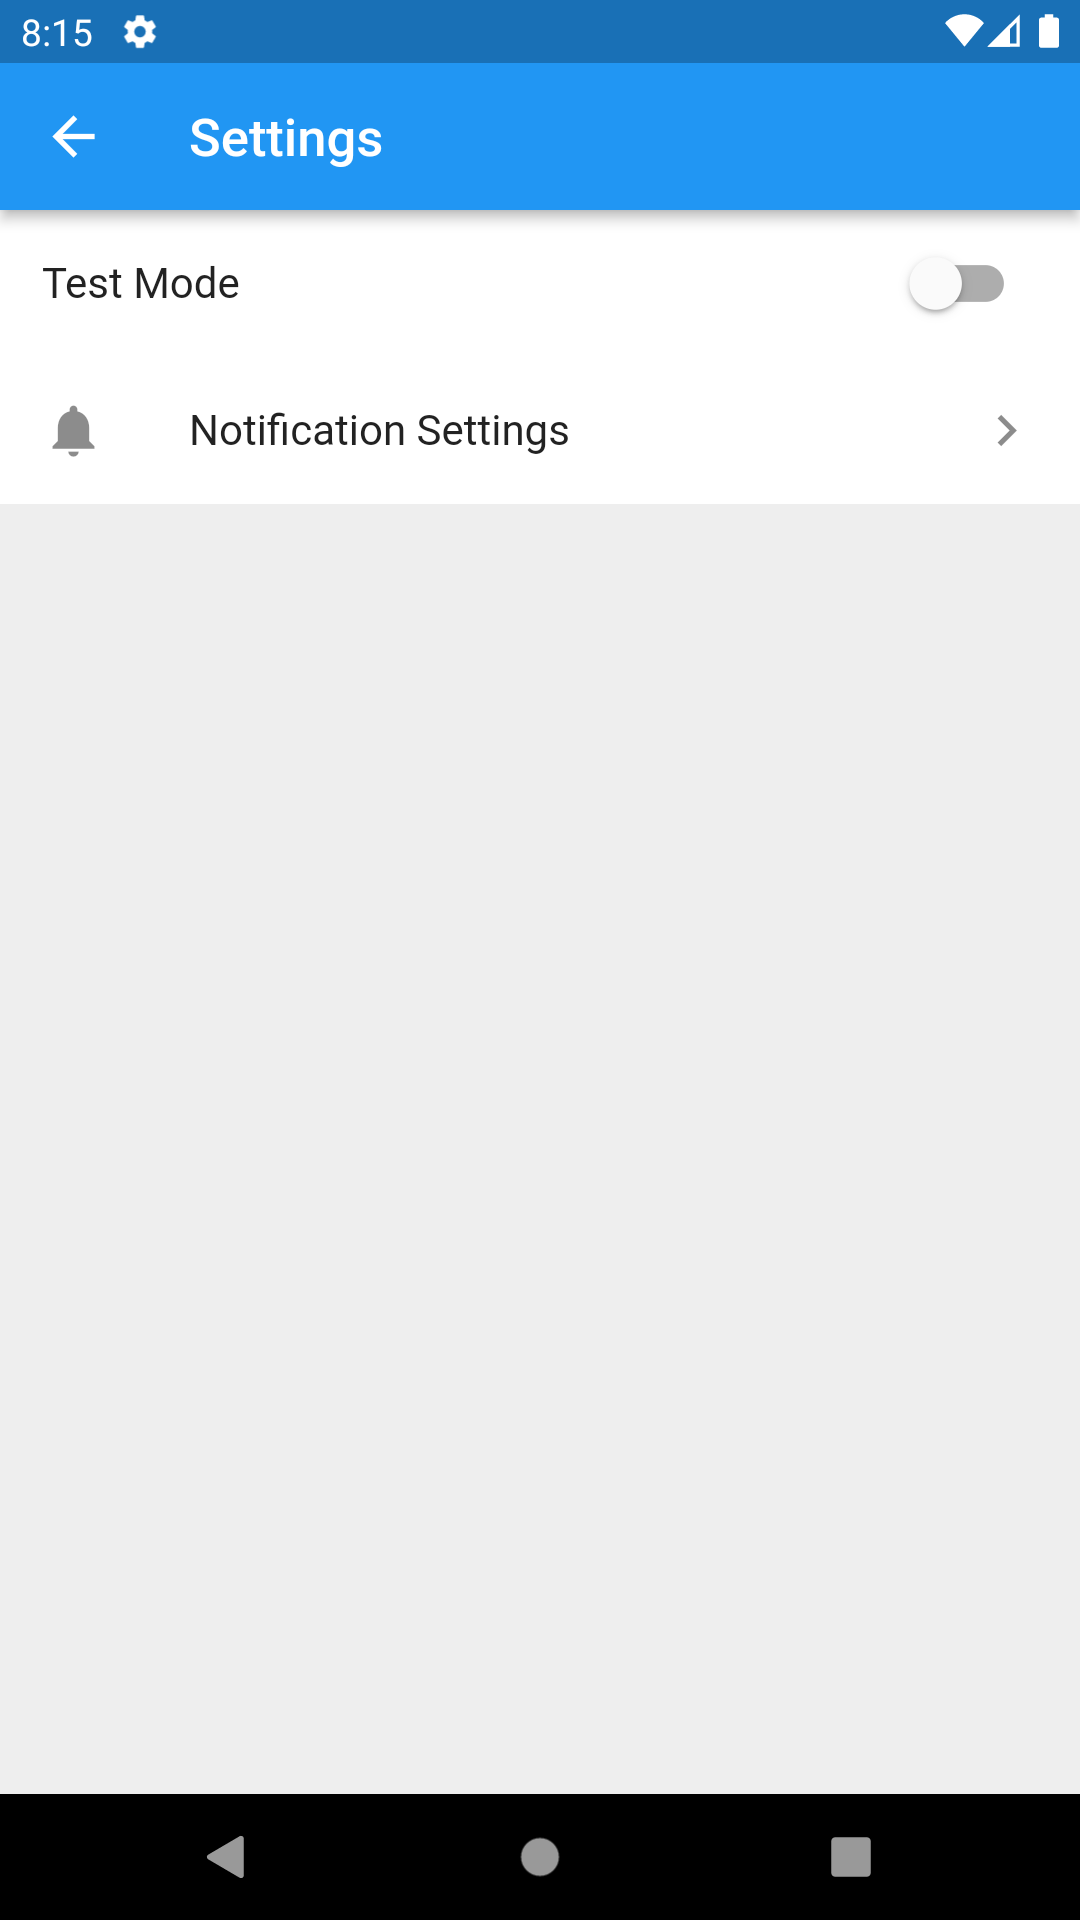
Lastly, the ‘Test Mode’, we want a simple switch that activates a timed test mode. In the Home Service, I just defined a timer, and the testMode ValueNotifier boolean, much like the location variable. Then, implemented a switch that has a value based on the current testMode boolean thanks to the ValueListenableBuilder. (For Android devices, we use the standard Switch component, but for iOS/Apple devices, the Cupertino one, which is the same component but with Apple’s style.)
Finally, the start and cancel functions simply flip the variable, while starting or canceling the timer to set the testMode boolean to false. No other logic is required, as ValueNotifier and all its listeners automatically handle value changes.